Contents
- 1 How to Polish Cattle Horns: A
- 2 How to Polish Cattle Horns: Expert Guide
- 3 Advanced preparation techniques
- 4 Specialized Tools and Materials
- 5 The Expert Polishing Process
- 6 Advanced Techniques for Exceptional Results
- 7 Maintaining Professional-Grade Polished Horns
- 8 Quality Control and Documentation
- 9 Ethical Considerations in Professional Horn Polishing
- 10 Understanding Cattle Horns
- 11 Preparing the Horns for Polishing
- 12 Tools and Materials Needed for Polishing
- 13 The Polishing Process: Step-by-Step Guide
- 14 Advanced Polishing Techniques
- 15 Maintaining Polished Cattle Horns
- 16 Comparing Polishing Methods
- 17
- 18 Safety Considerations
- 19 Ethical considerations and alternatives
- 20 Frequently Asked Questions
- 21 What is the best way to remove stubborn stains from cattle horns before polishing?
- 22 How long does the entire polishing process typically take?
- 23 Can I polish cattle horns without power tools?
- 24 How often should I repolish my cattle horns to maintain their shine?
- 25 Are there any natural alternatives to commercial polishing compounds?
- 26 FAQ
- 27 Conclusion
- 28 External Resources
How to Polish Cattle Horns: A
Comprehensive Guide
Cattle horn polishing is an art form that produces exquisitely maintained and presented horns by fusing old processes with contemporary ones. Finding out “How to polish cattle horns” may enhance your craftsperson, taxidermist, or rancher skills and produce beautiful things. This in-depth tutorial will take you through the complex horn polishing process, from setup to cleanup. We’ll go over the necessary equipment and supplies, several polishing methods, and advice for getting a shine that looks like it comes from a professional. If you can learn “How to polish cattle horns,” you’ll be able to turn rough, unpolished horns into shiny pieces of art that highlight the inherent beauty of these unusual animal products.
help or advise on how to polish longhorn cattle caps.
Longhorn cattle hats need to be polished carefully and patiently. First, use a soft brush and warm, soapy water to thoroughly clean the cap. After the surface has dried, smooth it out using fine-grit sandpaper, working your way up to 2000 grit while constantly sanding in the same direction. Using a soft cloth, apply a little quantity of polishing compound and use circular motions to massage it into the horn. Employ increasingly finer
compounds for a glossier finish. Lastly, use a fresh microfiber towel to buff. Use a moist towel to wipe the polish often, and add a little coat of mineral oil every now and again to preserve it. Always operate in an area with good ventilation and use safety gear.
How to Polish Cattle Horns: Expert Guide
Understanding Horn Composition and Structure
As an expert in horn polishing, it’s crucial to have an in-depth understanding of horn composition and structure. Cattle horns are primarily composed of keratin, the same protein found in hair and nails. However, the density and structure of horn keratin are significantly different:
- Layered Structure: Horns have a laminated structure, with layers of keratin fibers arranged in a helical pattern.
- Density Variation: The density of the horn increases from the core to the outer surface.
- Growth Rings: Similar to tree rings, horns have growth rings that can affect polishing techniques.
Understanding these characteristics allows for tailored polishing approaches based on the specific horn’s age, origin, and condition.
Advanced preparation techniques
Precision Cleaning
- Ultrasonic Cleaning: Use an ultrasonic cleaner with a specialized horn cleaning solution to remove deeply embedded dirt and oils.
- Chemical Degreasing: Apply a professional-grade degreasing agent, leaving it on for 10-15 minutes before rinsing thoroughly.
- pH Balancing: After cleaning, use a pH neutral solution to restore the horn’s natural pH, preventing long-term damage.
Surface Mapping
Before beginning the polishing process, create a detailed surface map of the horn:
- Use a high-resolution digital microscope to identify microcracks, pits, and variations in density.
- Create a digital 3D model of the horn to plan your polishing strategy, especially for complex shapes or patterns.
- Mark problematic areas with removable, solvent-resistant markers for targeted treatment.
Specialized Tools and Materials
Cutting-Edge Abrasives
- Diamond-impregnated sanding pads: Offer superior cutting power and longevity compared to traditional sandpaper.
- Ceramic abrasive discs: Provide consistent performance and generate less heat during use.
- Nano-abrasive compounds: Allow for ultra-fine polishing at the microscopic level.
High-Precision Tools
- Variable-speed micro-motor handpiece: Offers greater control and precision than traditional rotary tools.
- Pneumatic polishing system: Provides consistent pressure and speed, ideal for large or multiple horns.
- Laser-guided polishing attachment: Ensures even application of pressure and consistent results across the horn’s surface.
The Expert Polishing Process
Stage 1: Precision Shaping
- Use a 3D-printed guide to ensure symmetry when shaping paired horns.
- Apply controlled heat (not exceeding 150°F/65°C) to slightly soften the horn for easier shaping.
- Use a high-speed carbide burr for initial shaping, followed by progressively finer diamond burrs.
Stage 2: Layered Sanding
- Begin with 400-grit diamond pads, working up to 3000-grit in increments of 200.
- Use a cross-hatch sanding pattern to ensure even material removal.
- Apply a thin layer of mineral oil between grits to lubricate and reveal any remaining scratches.
Stage 3: Compound Polishing
- Start with a heavy-cut compound on a wool pad, using a slow speed (1000-1500 RPM) and light pressure.
- Progress to a medium-cut compound on a foam pad, increasing speed to 1500-2000 RPM.
- Finish with a fine-cut compound on a microfiber pad at 2000–2500 RPM.
Stage 4: Nano-Abrasive Finishing
- Apply a nano-abrasive polish with particles smaller than 1 micron.
- Use a soft leather pad at low speed (800-1000 RPM) for 3-5 minutes per section.
- Buff with a clean microfiber pad to remove any residue and reveal the final shine.
Advanced Techniques for Exceptional Results
Grain Filling for Ultra-Smooth Finish
- Mix fine horn dust (collected during sanding) with clear epoxy resin.
- Apply the mixture to fill any micro-pores or subtle growth rings.
- Allow to cure, then sand and polish as normal, resulting in a glass-like surface.
Controlled Etching for Texture
- Create a resist pattern using acid-resistant wax or specialized masking tape.
- Apply a mild acid solution (such as diluted phosphoric acid) for 30-60 seconds.
- Neutralize immediately with a baking soda solution, then rinse thoroughly.
- Polish the etched areas lightly to soften the texture while maintaining the pattern.
Color stabilization and enhancement
- Use a UV-resistant penetrating dye to enhance natural color variations.
- Apply multiple thin layers, allowing each to dry and buffing lightly between applications.
- Seal with a UV-resistant clear coat to prevent fading and color shift over time.
Maintaining Professional-Grade Polished Horns
Environmental Control
- Store polished horns in a climate-controlled environment, maintaining 45–55% relative humidity.
- Use UV-filtering display cases or coatings to prevent yellowing and degradation of the polished surface.
- Implement a rotation system for displayed horns to ensure even exposure and wear.
Periodic Rejuvenation
- Every 6-12 months, apply a specialized horn conditioning cream to maintain hydration and luster.
- Perform a light polish with a fine compound every 2-3 years to refresh the shine.
- Reapply UV protection coatings annually, especially for horns in direct sunlight or bright display areas.
Quality Control and Documentation
Surface Quality Metrics
- Use a gloss meter to measure and maintain consistent shine levels across projects.
- Employ a surface roughness tester to quantify smoothness, aiming for Ra values below 0.1 μm.
- Conduct regular calibration of all measuring instruments to ensure accuracy.
Project Documentation
- Maintain detailed records of each horn polished, including:
- Initial condition assessment and photographs
- Techniques and materials used at each stage
- Before and after measurements (weight, dimensions, gloss levels)
- Any special treatments or repairs performed
- Use this documentation to refine techniques and provide transparency to clients or collectors.
Ethical Considerations in Professional Horn Polishing
Sourcing and authenticity
- Develop relationships with ethical horn suppliers who can provide detailed provenance information.
- Implement a verification system to ensure horns are legally and ethically sourced.
- Consider specializing in restoration of antique or heirloom horns to minimize demand for new horn products.
Sustainability Practices
- Implement a closed-loop water filtration system to minimize waste and the environmental impact of polishing compounds.
- Use biodegradable cleaning and polishing products whenever possible.
- Recycle horn dust and shavings for use in other crafts or as organic fertilizer.
By adhering to these expert techniques and considerations, you can elevate your horn polishing skills to a professional level. Remember that true expertise comes from continuous learning, experimentation, and a deep respect for the material you’re working with. Each horn presents unique challenges and opportunities, allowing you to refine your craft with every project.
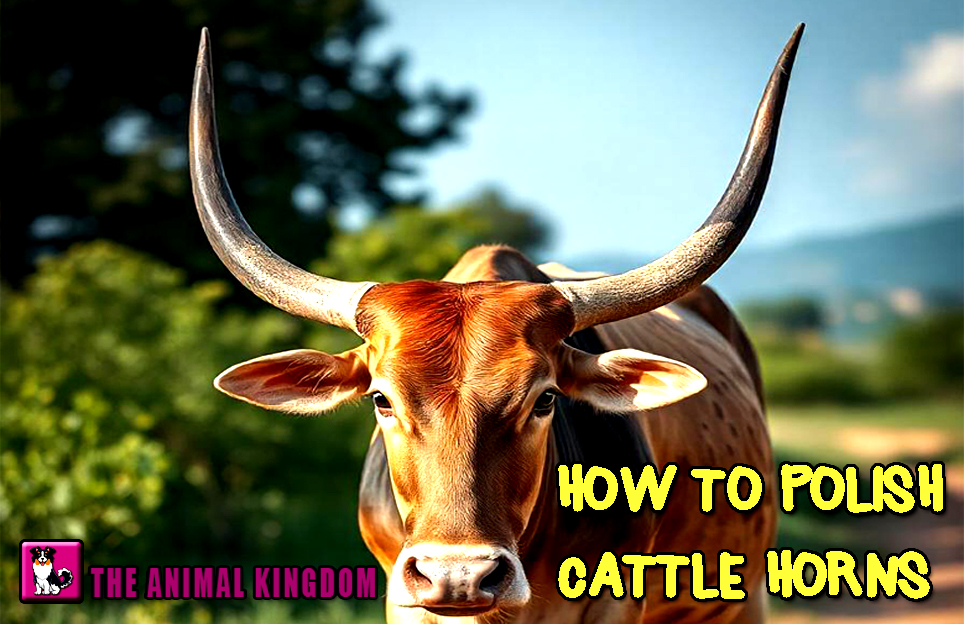
Understanding Cattle Horns
Anatomy of Cattle Horns
Before diving into the polishing process, it’s essential to understand the structure of cattle horns. Cattle horns are composed of two main parts:
- The bony core: This is the inner structure of the horn, which is an extension of the skull.
- The keratin sheath: This is the outer layer of the horn, made of the same protein found in hair and nails.
The keratin sheath is what we’ll be focusing on when polishing. It’s important to note that the texture and density of the horn can vary depending on the breed of cattle, age of the animal, and environmental factors.
Types of Cattle Horns
Different cattle breeds produce horns with varying characteristics:
- Longhorn cattle: Known for their impressive, curved horns that can span up to 7 feet from tip to tip.
- Highland cattle feature thick, curved horns with a wide base.
- Ankole-Watusi cattle: Possess extremely large, curved horns that can reach up to 8 feet in total horn span.
- Texas Longhorn: Have horns that can grow in various shapes and directions.
Understanding the specific type of horn you’re working with will help you adjust your polishing technique accordingly.
Preparing the Horns for Polishing
Cleaning and Degreasing
Before you begin the polishing process, it’s crucial to thoroughly clean and degrade the horns. This step ensures that the polishing compounds will adhere properly and produce the best results.
- Wash the ears with warm, soapy water to remove any dirt or debris.
- Use a degreasing agent such as acetone or mineral spirits to remove any oils from the horn’s surface.
- Scrub the horns gently with a soft bristled brush to reach all crevices and textures.
- Rinse the horns thoroughly with clean water and allow them to dry completely.
Removing the Bony Core
If you’re working with freshly harvested horns, you’ll need to remove the bony core before polishing.
- Soak the horns in warm water for several hours to loosen the connection between the core and the sheath.
- Use a long, thin tool (like a screwdriver or specialized horn tool) to carefully separate the sheath from the core.
- Gently twist and pull the sheath to remove it from the core.
- Clean the inside of the sheath thoroughly to remove any remaining tissue.
Repairing Cracks and Imperfections
Inspect the horns for any cracks, chips, or imperfections.
- For small cracks, use a two-part epoxy designed for horn repair.
- Fill larger gaps or chips with a mixture of horn dust (created by sanding) and epoxy.
- Allow the repairs to cure completely before proceeding with the polishing process.
Tools and Materials Needed for Polishing
Essential Tools
To effectively polish cattle horns, you’ll need the following tools:
- Variable speed rotary tool (e.g., Dremel)
- Bench grinder (optional, for initial shaping)
- Sandpaper in various grits (80, 120, 220, 400, 600, 800, 1000, 1500, 2000)
- Polishing wheels (felt, cotton, and microfiber)
- Buffing compounds (coarse, medium, and fine)
- Protective gear (safety glasses, dust mask, gloves)
- Soft cloths for hand polishing and cleaning
Polishing Compounds
Choosing the right polishing compounds is crucial for achieving a high-quality finish.
- Coarse compound: For initial polishing and removing deeper scratches
- Medium compound: For smoothing out the surface and preparing for the final polish
- Fine compound: For achieving a high gloss and mirror-like finish
Optional Materials
Consider these additional materials for enhanced results:
- Horn oil or conditioning cream
- UV-resistant clear coat for added protection
- Specialized horn polishing kits
- Magnifying glass for inspecting fine details
The Polishing Process: Step-by-Step Guide
Step 1: Initial Shaping and Rough Sanding
- If necessary, use a bench grinder to shape the horn to your desired form.
- Begin with 80-grit sandpaper to remove any major imperfections and even out the surface.
- Progress to 120-grit sandpaper, sanding in a consistent direction to create an even texture.
- Use 220-grit sandpaper to further smooth the surface, paying attention to any remaining rough spots.
Step 2: Fine Sanding
- Move on to 400-grit sandpaper, continuing to sand in the same direction.
- Progress through 600, 800, and 1000-grit sandpapers, spending ample time with each to ensure a smooth transition.
- Finish with 1500 and 2000-grit sandpaper for an ultra-smooth surface.
- Between each grit, clean the horn thoroughly to remove sanding dust.
Step 3: Initial Polishing
- Attach a felt polishing wheel to your rotary tool.
- Apply a small amount of coarse polishing compound to the wheel.
- Begin polishing the horn at a low speed, gradually increasing as you become comfortable.
- Work in small sections, applying even pressure and overlapping slightly to ensure full coverage.
- Continue until the entire horn has been polished with the coarse compound.
Step 4: Medium Polishing
- Switch to a cotton polishing wheel and medium polishing compound.
- Repeat the process, working in small sections and maintaining even pressure.
- Pay special attention to any areas that may need extra work to achieve a consistent finish.
Step 5: Fine Polishing
- Use a microfiber polishing wheel with a fine polishing compound.
- Polish the entire horn, focusing on bringing out a high shine and smooth finish.
- Take your time with this step, as it will determine the final quality of the polish.
Step 6: Hand Polishing and Finishing
- Use a soft cloth to hand polish the horn, removing any remaining compound residue.
- Apply a small amount of horn oil or conditioning cream to nourish the horn and enhance its natural luster.
- If desired, apply a UV-resistant clear coat for added protection and shine.
Advanced Polishing Techniques
Creating Patterns and Designs
For a unique finish, consider incorporating patterns or designs into your polished horns:
- Use masking tape to create geometric patterns before polishing.
- Experiment with different grains of sandpaper in specific areas to create textured designs.
- Apply acid etching techniques to create intricate patterns (use caution and proper safety equipment).
Color Enhancement
Enhance the natural color of the horns or add new hues:
- Use natural dyes made from plants to add subtle color variations.
- Apply commercial horn dyes for more vibrant or specific colors.
- Try stacking several hues to create a distinctive appearance.
Inlay and Embellishment
Add extra flair to your polished horns with inlay work:
- Create small grooves or channels in the horn surface.
- Fill these areas with materials like turquoise, silver, or colored resins.
- Polish the inlaid areas to create a seamless finish with the rest of the horn.
Maintaining Polished Cattle Horns
Regular Cleaning
To keep your polished horns looking their best:
- Dust regularly with a soft, dry cloth.
- Clean with a slightly damp cloth when needed, avoiding excess moisture.
- Use a mild soap solution for more thorough cleaning, rinsing, and drying promptly.
Periodic Re-Polishing
Over time, polished horns may lose some of their luster.
- Assess the condition of the horns every few months.
- For minor dulling, use a fine polishing compound and hand-polish with a soft cloth.
- For more significant wear, repeat the fine sanding and polishing steps.
Environmental Considerations
Protect your polished horns from environmental factors:
- Store horns away from direct sunlight to prevent fading and drying.
- Maintain consistent humidity levels to prevent cracking or warping.
- Use protective cases or covers when transporting or displaying horns in variable conditions.
Comparing Polishing Methods
To help you choose the best polishing method for your needs, consider the following comparison table:
| Method | Time Required | Skill Level | Equipment Cost | Finish Quality | Durability |
|---|---|---|---|---|---|
| Hand Polishing | High | Low | Low | Moderate | Moderate |
| Power Tool Polishing | Moderate | Moderate | High | High | High |
| Professional Service | Low | N/A | High | Very High | Very High |
| DIY Kit | Moderate | Low-Moderate | Moderate | Moderate-High | Moderate-High |
Safety Considerations
When polishing cattle horns, prioritize safety:
- Always wear safety glasses to protect your eyes from debris and polishing compounds.
- Use a dust mask to avoid inhaling horn dust and polishing compound particles.
- Wear gloves to protect your hands from abrasives and chemicals.
- Work in a well-ventilated area, especially when using chemical compounds or clear coats.
- Follow proper handling and disposal procedures for any chemicals used in the polishing process.
Ethical considerations and alternatives
While polishing cattle horns can be a rewarding craft, it’s important to consider ethical implications:
- Source horns from ethical suppliers who prioritize animal welfare.
- Consider using shed antlers or ethically sourced horns from animals that have died naturally.
- Explore alternatives like replica horns made from resin or other materials for practicing techniques.
Frequently Asked Questions
What is the best way to remove stubborn stains from cattle horns before polishing?
Try it out with Make a paste using baking soda and water for tough stains. After applying this to the discolored regions, allow it to stay for ten to fifteen minutes, and then gently scrub with a soft brush. Rinse well and repeat as required. You might need to hire an expert or use a specific horn cleaning for really stubborn stains. overlaying several hues to create a special look.
How long does the entire polishing process typically take?
The time required to polish cattle horns can vary greatly depending on the initial condition of the horns, the desired finish, and your experience level. On average, expect to spend 4–8 hours for a pair of horns, spread over several sessions. This includes initial cleaning, sanding, polishing, and finishing steps.
Can I polish cattle horns without power tools?
Yes, it’s possible to polish cattle horns without power tools, but it will require more time and physical effort. Use progressively finer grades of sandpaper for manual sanding, followed by hand polishing with compounds applied to a soft cloth. While this method can achieve good results, it may be challenging to match the high gloss finish possible with power tools.
How often should I repolish my cattle horns to maintain their shine?
The frequency of re-polishing depends on how the horns are displayed or used. For decorative pieces kept in stable environments, a light polish every 6–12 months may be sufficient. Horns exposed to more wear or variable conditions might need attention every 3–6 months. Regular dusting and cleaning can help extend the time between polishing sessions.
Are there any natural alternatives to commercial polishing compounds?
Yes, some natural alternatives can be effective for polishing horns, especially for achieving a more traditional finish. Try using a mixture of finely ground pumice stone and linseed oil for coarser polishing, progressing to a paste made from rottenstone (a fine abrasive) and mineral oil for finer polishing. For the final shine, a mixture of beeswax and carnauba wax can be applied and buffed to a high gloss.
FAQ
1. What is the best polish for horns?
2. How do you polish a natural horn?
To polish a natural horn, start by cleaning it thoroughly with mild soap and water. Gradually sand the surface using progressively finer grits of sandpaper (220 to 2000). Apply polishing compound with a soft cloth, working in circular motions. Finish by buffing with a clean microfiber cloth. For extra shine, use a specialized horn wax.
3. How do you clean horns?
Start with a moderate technique while cleaning horns. Use a soft-bristled brush to gently clean the area with lukewarm water and mild soap. Make a paste with water and baking soda for more stubborn dirt. Steer clear of strong chemicals, as they may harm the horn. Use a soft towel to completely dry after rinsing. Use a specialist horn cleaner for thorough cleaning.
4. How do you clean a natural horn?
Rinse a natural horn with warm water to get rid of any debris. Scrub the interior carefully with a gentle brush. Steer clear of strong chemicals. Use a mild soap for deeper cleaning, and then give it a good rinse. Before storing, let everything dry fully. Frequent cleaning prolongs the life of the instrument and improves sound quality.
Conclusion
A satisfying task requiring artistry, patience, and attention to detail is learning the technique of polishing bull horns. You’ve learned the crucial techniques for turning rough horns into gorgeous, polished pieces that highlight the inherent beauty of these distinctive animal products by following this thorough course. You now possess the know-how to produce completed horns of expert quality, from basic cleaning and preparation to sophisticated polishing methods and upkeep.
Always keep in mind that practice makes perfect, and working on more horns can help you hone your abilities and create your own distinctive sound. A useful talent that links us to ancient traditions while embracing new techniques is the ability to polish bull horns to a high sheen, whether you’re preparing trophies, making art, or conserving family relics.
As you pursue your skill further, be willing to learn new techniques, try out other materials, and impart your expertise to others. The options in the world of horn polishing are endless, and your newly developed abilities lead to a world of imaginative possibilities. Accept the process, delight in the changes, and be proud of the exquisite outcomes of your hard work. Cheers to polishing!
External Resources
For further information and supplies, consider exploring these resources:
- International Horn Society: While focused on musical horns, this site offers valuable insights into horn care and maintenance.
- Taxidermy.net Forums: A community of professionals and enthusiasts discussing various techniques, including horn polishing.
- Rio Grande Jewelry Supply offers a wide range of polishing supplies and compounds suitable for horn polishing.
- The Bone Room: A source for ethically obtained horns and related materials.
- Journal of Conservation and Museum Studies: Provides academic articles on preservation techniques that can be applied to horn polishing.
Remember to always verify the credibility and relevance of any external resources before applying new techniques or purchasing supplies.